How to add Floorplans?
Clear and aesthetically pleasing 2D floor plan can facilitate your users' navigation through the property. Additionally, it will be easier for them to orientate themselves in the room's arrangement.
From the side menu, select Virtual Tours -> Maps.

Be sure to give a Name to the new plan and choose the type of map.
You can choose between Floorplan (image) and Map (you can find more information about adding an interactive map here).
Select the previously prepared Map image from your disk and add it to the administrative panel.

After clicking the +Create button, you will be taken to the Floorplan settings and editing page.
The most important function is to add Floorplan Point on the map, which are navigation points directing to specific Rooms.
You can add a Floorplan Point by clicking on the + icon.
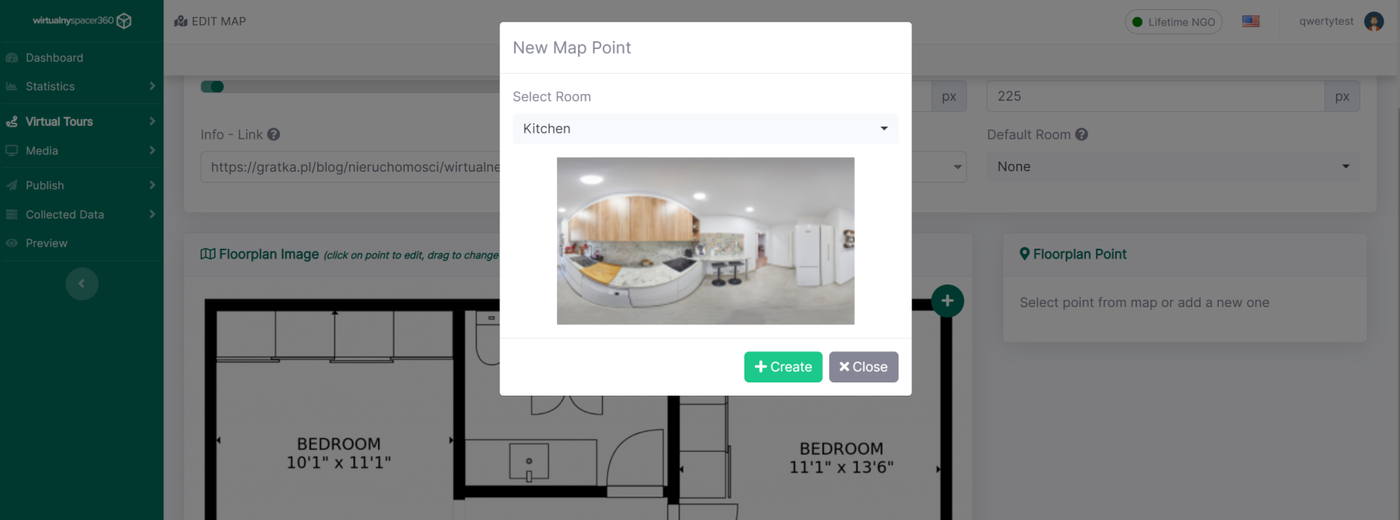
After selecting a room, a navigation point will appear on the map. You can click on the point to edit its properties, such as the name or the destination room. You can also drag the point to change its position on the map.

In addition to the standard option of changing the floorplan name, the editor allows you to:
- Set the north direction along with display configuration options for the compass rose on the floorplan.
- Add an info-link that displays an information button on the floorplan that calls a specified link.
- Determine the dimensions of the floorplan thumbnail in pixels for desktop and mobile.
- Choose the default room for the floorplan. Note that selecting None means that no room will be displayed automatically when you change to this floorplan.
To test the navigation on the Floorplan, select Preview.

The editor also allows you to add Interactive Maps.